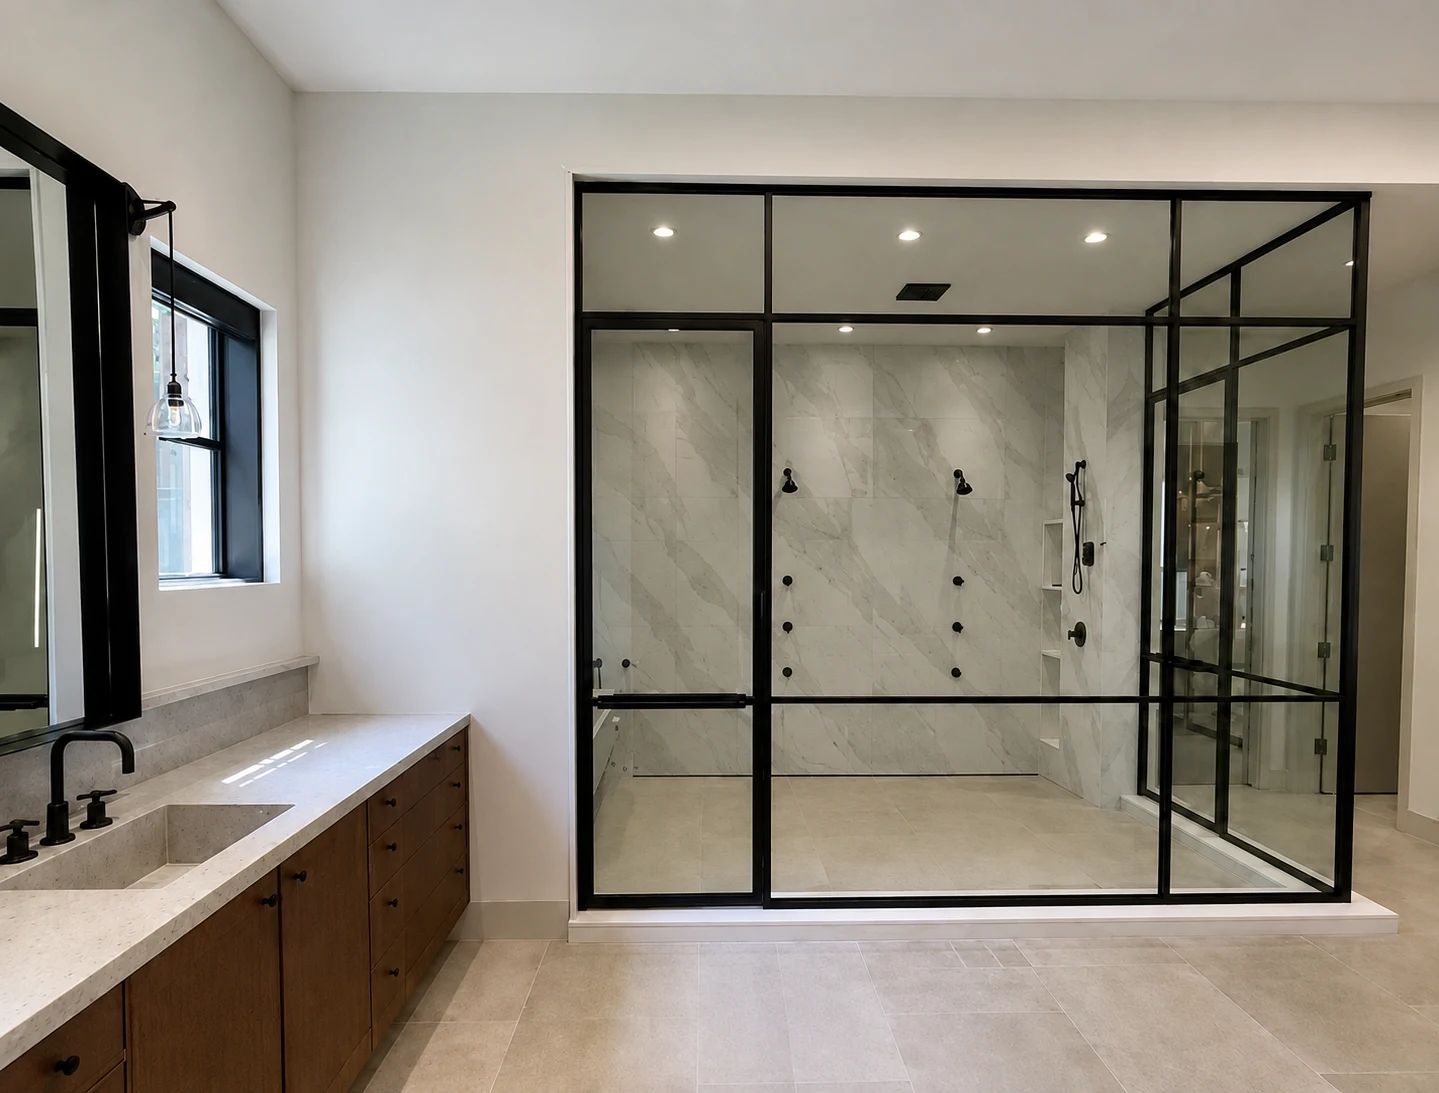
A custom steel shower enclosure can make the wet room feel like architecture rather than equipment. The steel grid gives the room proportion, while the glass keeps stone, light, and sightlines visible. Its success depends on very practical relationships: door swing, curb and floor slope, waterproofing, fixture clearance, safety glass, seals, and finished dimensions.
The short answer
You do not need final stone dimensions or a glass specification before calling. Send the bathroom plan or several photographs, approximate enclosure size, inspiration, and the location you imagine for the door. D’Hierro can identify which decisions must happen before tile and stone are complete and which can wait for the field survey.
What you decide
- The visual direction: quiet grid, traditional divided-light character, minimal framing, or a more decorative enclosure.
- Door location and preferred swing.
- Clear, low-iron, textured, or another privacy direction to be evaluated with the project team.
What D’Hierro handles
D’Hierro develops the custom steel partition elevations, door and sidelite proportions, frame profiles, hardware preparation, finish, shop drawings, field verification, fabrication, glass coordination, and installation. The architect, builder, waterproofing contractor, stone/tile installer, plumber, and glass supplier confirm the wet-area assembly, slope, safety-glazing requirements, and interfaces outside the steel scope.
Draw the wet room before drawing the grid
Show the complete enclosure in plan and elevation, including:
- Shower heads, hand showers, body sprays, controls, niches, benches, and drains.
- Curb, curbless transition, floor slope, and finished floor elevations.
- Vanities, toilets, tubs, towel bars, hooks, and door-clearance zones.
- Stone or tile module, grout joints, slabs, and panel seams.
- Ceiling height, soffits, arches, beams, and lighting.
- Waterproofing extents and penetrations that should be avoided.
- Exhaust, conditioning, and any steam-shower requirements.
The steel divisions should respond to the room. A horizontal line can align with a stone joint, vanity, niche, or hardware datum; an arbitrary line can make every adjacent element look slightly misplaced.
Choose the door from the way the bathroom works
Walk the swing with the plan open. Confirm that the pull and glass clear fixtures, towels, benches, walls, and circulation. Consider where a person stands while opening the door and where water on the inside face drains when the door moves.
A pair can create a larger opening but adds a meeting condition. A single door is simpler but still needs a comfortable clear width and a place to swing. Pivot and hinged operations introduce different head, sill, closer, and hardware details. The enclosure does not need to mimic the front door; it needs to serve the wet room.
For an enclosed steam shower, pressure, seals, ventilation, ceiling, and equipment introduce a specialized set of requirements. Identify that intent at the beginning so the project team can establish the correct complete system.
Safety glass is a requirement, not a style
Federal architectural-glazing rules in 16 CFR Part 1201 cover glazing materials used in shower doors and enclosures. The building code also governs glass and glazing. The project team and glass supplier should establish the compliant glass type, thickness, markings, fabrication, and installation for the exact enclosure.
Tempered, laminated, low-iron, textured, and coated glass describe different properties and should not be treated as interchangeable labels. Record the approved make-up and appearance. Holes, notches, edges, hardware cutouts, and steel stops must coordinate before the glass is fabricated.
Freeze dimensions after the finishes are real
Stone, tile, plaster, curb caps, floors, and ceilings rarely finish at their nominal drawing dimensions. A custom enclosure should be field-measured at the milestone agreed by the shop and builder, after the controlling surfaces are stable enough to rely on.
Before that survey, coordinate blocking, waterproofing, penetrations, steel attachment zones, and the intended finish build-up. After the survey, protect the opening dimensions from casual changes. A late stone cap or revised floor elevation can affect the door clearance and glass sizes.
Project proof: the Westlake wet room
The Corner Steel Shower Enclosure wraps a marble wet room with two espresso-finished steel assemblies. One primary elevation is approximately 124½ by 116 inches; the return is approximately 62 by 116 inches. Each assembly combines a door, sidelite, and transom.
Its value as a guide is not that every shower should repeat those dimensions. It shows why the complete corner, stone, transoms, door swings, glazing, finish, and installation sequence must be read together.
What to send to begin
- Bathroom plan and elevations if available.
- Wide photographs of the room and close photographs of proposed attachment surfaces.
- Approximate enclosure width and height.
- Door location and swing preference.
- Stone, tile, plumbing, and finish references.
- Steam or standard shower intent.
- Builder, designer, waterproofing, and stone contacts.
- Project address and construction schedule.
Send the bathroom plan or photographs. We will tell you which decisions matter now and which belong after the room is ready for measurement.
Sources and technical references
These references support the technical context above. Project-specific design, code, engineering, and manufacturer requirements still control.